The Battle of Mylok IV was a campaign by Admiral Demetrius Zaarin to obtain experimental hyperdrive technology from Habeen and Nharwaak researchers during the Galactic Civil War, immediately following then-Admiral Thrawn's campaign at the Battle on the Frontier.
While the Habeen scientists eagerly sold the new technology to the Galactic Empire, the Nharwaak leaders dissented from the Habeen decision, preferring to make a deal with the Rebellion. Zaarin's forces ultimately succeeded in obtaining the new technology, after quelling Nharwaak dissidents. The hyperdrive technology received from the Habeen ultimately led to the production of the TIE Avenger starfighter.
Once Admiral Zaarin received information from Habeen researchers about new hyperdrive technology his interest was greatly motivated by the opportunity to improve and produce new TIE/Advanced starfighter prototypes. After negotiations, Habeen researchers arranged for a convoy of demonstration prototypes of their technology for Admiral Zaarin to evaluate.
The Habeen team sent dual cargo ferry groups Verack and Stimner to rendezvous with Admiral Zaarin aboard Nebulon-B2 frigate Shamus. Between acts of Rebel sedition and the known dispute between the Habeen and Nharwaak, members of the Secret Order advised trusted pilots to ensure that cargo aboard the Habeen transports matched their manifests.
Frigate Shamus deployed three flight groups of TIE/LN starfighters, Alpha, Beta, and Gamma, to secure the immediate area for the cargo transfer to the Shamus. As TIE fighter Alpha 2 saw to the inspection of Verack and Stimner, Nharwaak BTL Y-wing starfighters, Red and Gold groups, entered the system, plotting to disrupt the cargo transfer—as predicted.
As fighting erupted between the Imperial escort fighters and the impending Nharwaak Y-wings, CR90 corvettes Charger 1 & 2 joined the battle. Imperial fighters managed to suppress the initial attackers, but quickly became frustrated by additional Y-wings complementing Nharwaak losses, moreover successfully launching proton torpedoes against the cargo vessels. The Habeen Ferries sustained heavy damage from Y-wing Torpedo runs, but Imperial starfighters finally succeeded in eliminating the Nharwaak interlopers, permitting the cargo transfer completion.
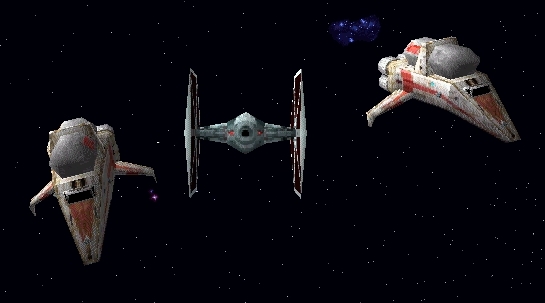
Habeen Cargo Ferries being inspected by TIE fighter Alpha 2
Habeen representatives visited Admiral Zaarin following the prototype transfer, urgently wanting to voice their opinions about the Nharwaak. Aboard the Shamus Admiral Zaarin received their concern about the Nharwaak's intention to sell the new technology to the Rebellion in the event the Habeen successfully arranged a deal with the Empire. Following the meeting Admiral Zaarin set out to send a message to the Nharwaak. With the aid of Imperial Intelligence, Admiral Zaarin launched a raid on the main Nharwaak base containing their share of the hyperdrive technology.
Three flight groups of TIE/sa bombers led the assault against the Nharwaak assembly of corvettes Petor, Shotgun, various cargo containers, Lambda-class T-4a shuttles Pamir, transport craft, and waiting Y-wings. The Imperial elimination of the Nharwaak installation was swift. Only Nharwaak Delta-class DX-9 stormtrooper transport Sunbird succeeded to forward any significant threat, launching torpedoes at frigate Shamus, but it too was silenced at the hands of Imperial TIE bombers.
The Nharwaak responded immediately with reprisals. Imperial starfighter pilots rushed to their fighters as Nharwaak Y-wings entered realspace near the Habeen research center. Assassin-class corvette Phoenix launched three groups of TIE bombers to join Habeen corvettes Notz and Phalanx, defending Habeen shuttles Doyle, Sgidek, and transport Runner for docking operations to safeguard hyperdrive technology being stored aboard defenseless containers.
Imperial TIE bombers swiftly squared off against the equally-sized force of Y-wings, already firing proton torpedoes at the Habeen facility. The Empire's bomber pilots frantically emptied their concussion missile magazines against the array of Y-wing fighters. Habeen containers took heavy damage, but not before Habeen rescue-craft could finish the paramount docking procedures. Imperial starfighters once again proved superior to Nharwaak bomber pilots, ending the dispute in a fury of missile volleys.
Having quelled the Nharwaak rebellion for the time being, Admiral Zaarin made arrangements to meet with Habeen diplomats to arrange for closure of a deal to provide Imperial forces with this new hyperdrive technology, while recognizing the Habeen as Imperial citizens. Zaarin's frigate Shamus would rendezvous with Habeen EF76 Nebulon-B escort frigate Lendova. Upon arrival, both frigates would launch diplomatic shuttles for a neutral meeting in space. Provided all parties could agree on suitable terms, Lendova would ferry transports carrying the finalized hyperdrive technology to the Shamus. Imperial Intelligence warned that despite the previous engagement with Nharwaak resistance, pilots should be alert for another attack, attempting to disrupt the final arrangements between the Habeen and the Empire. Secret Order agents furthermore requested that pilots inspect the cargo of arriving transports, keeping Habeen leaders to their word.
TIE interceptors from flight group Alpha patrolled the space around frigate Shamus awaiting the arrival of the Habeen diplomats. Imperial shuttle Nexus exited the hangar moments after Lendova arrived. Nexus boarded Habeen diplomatic shuttle Fairfax just as Nharwaak corvettes Phazer along with two groups of Y-wings. Deal finalizations completed as TIE interceptors belayed Nharwaak forces from any interference.
Habeen transports from group Ferry began transitioning over to frigate Shamus as fighting continued between interceptors and the lesser Y-wings. Phazer 1 began taking heavy fire from TIE interceptors passing by, finally being destroyed from a heavy volley of turbolaser fire from frigate Lendova. Transports Ferry continued the journey across the firefight one by one as Z-95 Headhunters arrived to aid the Nharwaak effort. Ferry 5 reached the safety of the Imperial frigate as hostilities drew to a close, TIE interceptors Alpha driving off or destroying the tenacious Nharwaak resistance.
Following the confrontation, Maarek Stele met with a Secret Order representative to report his findings. The robed figure expressed interest in a peculiar discrepancy in the cargo of one of the transports. The Secret Order agent suspected that perhaps this new technology contained in the final transport resulted from a subversive arrangement. The robed figure ended the conversation, informing Stele that Nharwaak researches continued to collaborate with Rebel forces, and to expect additional flight action soon.
Imperial Intelligence discovered a scheduled meeting between Rebel forces and the Nharwaak, keeping their word of intent to provide the Rebellion with this new technology. Frigate Shamus promptly deployed to the local system, dispatching Alpha-class Xg-1 Star Wing assault gunboats and TIE bombers to assault Rebel frigate Xerxes and its compliment of starfighters. Imperial leadership reinforced the importance that Rebel forces must not obtain the new hyperdrive technology.
Imperial fighters ruthlessly charged into the fray against Rebel B-wing starfighters and RZ-1 A-wing interceptors emerging from the Xerxes hangar. Assault gunboats competently managed to split their attack between enemy starfighters and frigate Xerxes, keeping the Rebel starship under pressure. Frigate Shamus neared the Xerxes as the battle unfolded between clashing starfighters. Xerxes weakened shields rapidly succumbed to the combined firepower of the superior Nebulon-B2 frigate Shamus. Gunboat Tau 1 swooped over transport Tela as it emerged from Xerxes' collapsing hull carrying escaping Rebel officers. Several volleys of precise laser fire reduced Tela to space garbage.
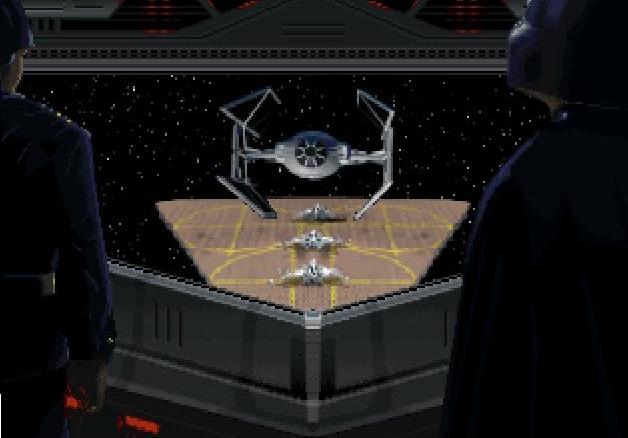
Zaarin's TIE Avenger demonstration for Lord Vader.
Admiral Zaarin has succeeded in gaining new technology from the Habeen, applying it to the latest TIE Advanced prototype. Admiral Zaarin invited Darth Vader to his research platform for a demonstration of the new TIE Avenger starfighter, now prepared for combat. The new starfighter's hyperdrive capability impressed Lord Vader, as Zaarin elaborated even further about research on an even more advanced TIE prototype. Vader expressed the Emperor's interest in Zaarin's progress, moreover interest in receiving a prototype of this newer TIE starfighter.
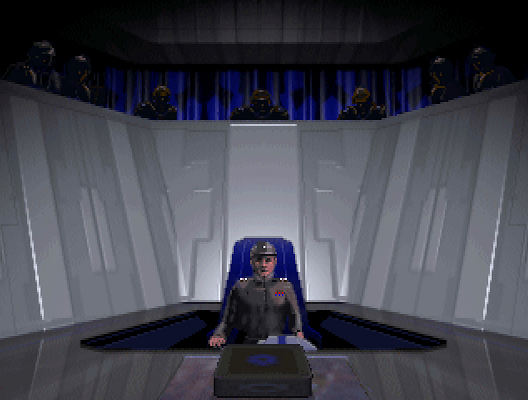
Maarek Stele receives the Medal of Order in a small ceremony.
Elsewhere Maarek Stele received instruction from the Secret Order about yet another transfer. The Order's representative suggested that, to accomplish the Emperor's goals, they needed a pilot of Stele's caliber. Further elaboration revealed that Stele's transfer was to Admiral Harkov's Victory-class Star Destroyer Protector. Prior to his transfer, he attended a small awards ceremony composed of a few Imperial officers where he was presented with the Medal of Order for his actions in the conflict. However, he found it difficult to be enthusiastic about winning the award, as he was experiencing misgivings about the Empire he had served.
- TIE Fighter: The Official Strategy Guide
- TIE Fighter Collector's CD-ROM: The Official Strategy Guide
- The Complete Star Wars Encyclopedia, Vol. II
- Star Wars: The Official Starships & Vehicles Collection 67