The Battle on the Frontier described a campaign undertaken by Grand Admiral Thrawn, that took place after the Battle of Hoth, and more specifically following Admiral Harkov's success in ending the Sepan Civil War. During this campaign, Thrawn succeeded in establishing a new Imperial installation in the Pakuuni system, a system in the Outer Rim which had trade routes which were considered extremely important for the Empire. A high amount of pirate activity prior to this campaign resulted in intergalactic trade there being extremely dangerous. Despite heavy resistance from local Pirates aided by the Rebellion Thrawn managed to install the installation and bring Imperial order to the system.
Thrawn, Vice Admiral at the time, began his pacification of the Pakuuni system by assessing the remnants of an abandoned manufacturing plant near the planet Argoon. Imperial forces suspected the abandoned cargo area was the result of transmissions from Rebel forces voicing their intent to destroy the loading area. Thrawn oversaw this operation from his flagship Victory-class Star Destroyer Stalwart, initially launching a single TIE Bomber to inspect the five groups of abandoned Cargo containers. TIE Bomber Alpha 1 discovered various useful station parts among the containers, resulting in the launch of Heavy Lifter group Mule. As the Heavy Lifters began to arrive to collect useful containers, Rebel Y-wings entered the area, heading for the Stalwart. TIE Fighter flight group Gamma was launched in response to the impending bombing runs, aided by TIE Bomber Alpha 1 having completed its inspections. Soon additional Rebel starships joined the battle, CR90 corvettes Dragon and Beecon, later followed by Viper. The Stalwart launched additional TIE Bombers and Interceptors to counter the increasing rebel threat. The new arrivals succeeded in quelling the enemy corvettes, only to be answered by rebel B-wings and X-wings emerging from hyperspace. As Imperial starfighters finished off the last of the Rebel raiders, all five Heavy Lifters from Mule had completed their mission and returned to the Stalwart's hangar. A single A-wing arrived as a last ditch effort to inflict Imperial casualties, however Thrawn's mission was already complete.
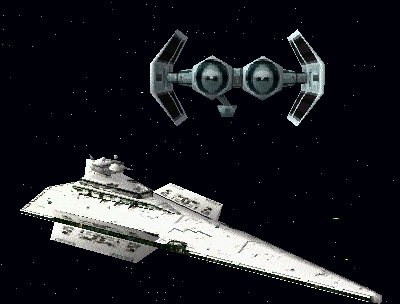
TIE Bomber Alpha 1 returning to Victory-class Star Destroyer Stalwart.
Having collected left over station parts from the abandoned depot, Admiral Thrawn assigned Commander Buckeye and Nebulon-B2 frigate Ludwick the task of destroying a local Pirate installation. The Pakuuni Pirates had massed a sizable armada of supplies, Corvettes, Y-wings, and Z-95 Headhunters. Imperial Intelligence suspected that local pirate groups had been receiving aid from Rebel starships; members of the Secret Order also suggested that searching the containers may reveal contraband, consequentially requiring capture. Frigate Ludwick began the assault by launching three groups of TIE Bombers. The Bombers began attacking Corvettes Leach, Clavier, and Grapler as pirate Z-95s and Y-wings moved to intercept. TIE Fighter group Theta was launched in response to TIE Bomber loses, more apt to dogfight with the enemies' shielded fighters. Maarek Stele, flight leader of TIE Bomber group Alpha, swung by the pirate containers during the battle. Stele discovered Rebels hiding among the containers; Assault Transport Tiger launched from the Ludwick to capture the Rebel fugitives. As predicted Rebel starfighters arrived just as the last of the containers exploded, having completed their primary mission Imperial Bombers returned to the hangar, leaving Rebel fighters to deal with interceptor craft and the Ludwick's turbolasers.
Grand Admiral Thrawn's task force had succeeded in eliminating the pirate outpost, establishing a foothold on the Pakuuni system. Following the initial attack, Frigate Ludwick patrolled the system until Imperial convoys carrying parts and construction crews could arrive to build a new space installation. Imperial intelligence reported high probability of enemy counter attack. The Ludwick deployed two flight groups of TIE Fighters and a group of Interceptors to patrol the system until the convoys arrived. Less than fifteen minutes before to the convoy arrived, Alliance Nebulon-B frigate Huntress emerged from hyperspace, launching B-wings and Z-95 Headhunters, rapidly joined by Y-wings from Gold group to bomb run the Frigate Ludwick. Imperial fighters bested the initial fighters fronted by the Rebel Alliance, swiftly replaced by fresh X-wings. Imperial Fighters fought vigilantly against the Rebel attack, however their Rebel rocket and torpedo attacks succeeded in heavily damaging the Ludwick's hull. As the Ludwick's condition deteriorated, Assassin-class corvette group Horvus arrived, along with Victory-class star Destroyer Stalwart and the rest of the convoy. With the might of the Stalwart and its combined task force, Frigate Huntress fled to the safety of hyperspace.
Having secured the system for the arriving convoy, construction finally began. Platform NL-1 neared completion just before another rebel assault. Imperial intelligence suggested that patrols be on the lookout for more hit and fade attacks from the hyperdrive capable rebel fighters, along with corvette class starships. Unyielding to Imperial presence, Rebel forces staged their first assault on the platform itself with A-wings, Y-wings and two Assassin-class corvettes from group Moori. With shields functioning at only fifty percent, Platform NL-1 stood severely exposed to the impending rebel assault. Imperial Gunboats, TIE Bombers and Interceptors from Frigate Ludwick rapidly found themselves engulfed in combat against Y-wings, A-wing and the newly arrived X-wing starfighters. A Portion of Assault Gunboat group Tau destroyed Corvettes Moori, resulting in the arrival of Shuttle Shakker. Prior to the attack, Secret Order agents had requested that trusted pilots arrange for the capture of such escape craft, in the hopes of extracting vital information concerning Rebel plans in the system. Maarek Stele himself saw to the identification of the Shakker, and its subsequent disabling. Transport Soryi launched from NL-1 to capture the Officers found aboard. As Imperial fighters whittled down the remaining rebel forces Transports from group Del arrived to attempt another futile torpedo run on the platform. With the capture of Shuttle Shakker, and Victory Star Destroyer Stalwart's arrival from hyperspace, it was not long before the destruction of the remaining rebel forces.
Essentially completed, Admiral Thrawn was anxious to inspect the work of his subordinates on NL-1. Much of Frigate Ludwick's TIE Fighter and Interceptor stores could not be fielded as a fighter screen during Thrawn's inspection, due to repair and refurbishing necessities; thus the Ludwick would suffice with heavily armed TIE Bombers to oversee the Vice Admiral's visit. Thrawn and his staff ferried from his command ship, to NL-1 aboard Transports Sigma. No sooner had Thrawn began his journey to NL-1 than another attack composed of Rebel A-wings and X-wings arrived. Imperial pilots moved to intercept as Thrawn's inspection team boarded the platform. Imperial fighters managed to finish off this low level assault just as Admiral Thrawn completed his inspection, returning to the Stalwart aboard Transport Omega. Moments after Imperial TIE Bombers moved to escort Thrawn back to the Stalwart, several groups of pirate shuttles arrived to add the disruption. Thrawn safely arrived aboard his vessel as Imperial fighters suppressed the last of the pirate nuisance.
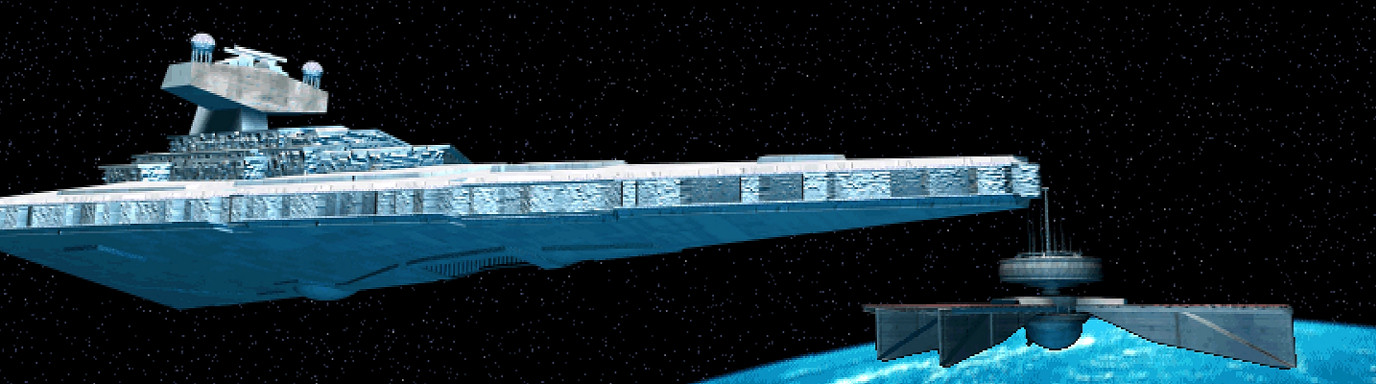
XQ3 Platform NL-1 over planet Pakuuni.
Victory Star Destroyer Stalwart stayed on station for the last critical steps of the station construction effort. System Patrol Craft Ranger arrived not longer after the previous enemy engagement. The Stalwart then departed the system to aid the arrival of relief for the battle weary pilots of Frigate Ludwick. In the absence of a Star Destroyer, patrol frequency increased and pilots aboard the Ludwick anticipated additional enemy activity. In the hopes of gathering additional information, members of the Secret Order tasked pilots to be alert for any craft carrying high priority targets. Local Rebel forces spared no expense in yet another attempt to eliminate Imperial control of the Pakuuni sector. Assault Transports Thunder soon arrived, accompanied by B-wings, the rebels more advanced assault craft. Escorting Gunboats, TIE Bombers, and Interceptors moved to intercept, followed by the arrival of a suspicious shuttle. An Imperial Gunboat inspected and disabled this shuttle Electra; revealed to be carrying Rebel Advisors. During this event, more Rebel forces arrived aboard Transports Rover, along with A-wing and X-wing fighters. Transport Shark, dispatched to capture Shuttle Electra, succeeded in its mission even amidst the heavy fighting. The rebel onslaught heavily taxed Imperial pilot abilities, and inflicted heavy damage to station NL-1 and patrol craft Ranger. Despite this, Imperial starfighters wrestled the upper hand from the imposing rebels, just as Victory Star Destroyer Stalwart arrived with Frigate Gaarni, CR90 Corvette Stallion, and supplies aboard Bulk Freighters Sivaa, to relieve Frigate Ludwick.
Following the final assault on Platform NL-1, Admiral Thrawn's forces saw to the final repairs resulting from the previous conflict. Thrawn anxiously observed the repair operations from his flagship, keeping his subordinates on a hasty schedule. With the establishment of NL-1, Vice-Admiral Thrawn moved onto other assignments, while Maarek Stele received yet another transfer to yet another vessel and task force.
The Battle on the Frontier is Battle 3 of Star Wars: TIE Fighter.
During this campaign, Maarek Stele received the promotion to Commander.
"THX 1138" was the name of a group of type B cargo containers in this campaign. One of many places LucasArts used this call sign for various Star Wars objects and characters.
For an unknown reason Platform NL-1 changes from type C to type A in the final mission of the campaign.
- TIE Fighter: The Official Strategy Guide
- TIE Fighter Collector's CD-ROM: The Official Strategy Guide