The Terror was an Executor-class Star Dreadnought in service to the Galactic Empire during the Galactic Civil War. Under the command of Admiral Sarn, the Terror was assigned to protect the development of a new cloaking device for use with the TIE Phantom starfighter and was itself fitted with one of the devices, allowing it to become invisible to both sensors and the naked eye. During a visit from the Dark Lord of the Sith Darth Vader to oversee the deployment of the new starfighter in 3 ABY, the Terror was infiltrated by two Rebel saboteurs. The infiltrators, Rookie One and Ru Murleen, managed to steal a TIE Phantom and used it to destroy the Terrors main reactor while it was docked to the TIE Phantom factory over Imdaar Alpha. Lord Vader escaped the Terror moments before the reactor exploded, destroying the Star Dreadnought, but he executed Sarn for his incompetence before leaving.
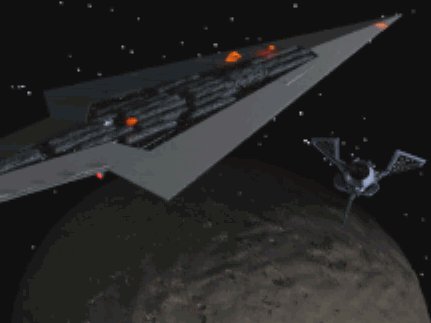
At nineteen kilometers long, the Executor-class Star Dreadnought Terror was one of the largest battleships in service to the Galactic Empire. Like all those of its class, the Terrors gray hull was roughly shaped like an arrowhead when viewed from above. The top of the ship had a smooth hull surrounding an island of habitable sections in the center and a trapezoidal command tower towards the rear. The underside was covered by a network of superstructure and the thirteen red-glowing engines which propelled it through space.
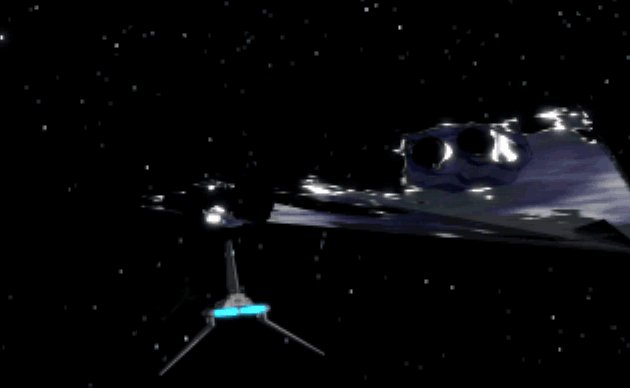
The Terror decloaks.
When the Terror was assigned to the TIE Phantom project, it was fitted with a cloaking device powered by stygium crystals. The cloaking device allowed the Terror to become invisible to both the naked eye and sensor systems on other starships. Approaching Imperial vessels were required to transmit the correct security code before the ship would decloak to allow them to dock. As the cloaking device was deactivated, the Terror would become visible from bow to stern, with the whole process completing in under ten seconds.
The Terror was equipped to act as a carrier for the Empire's fleet of TIE Phantoms. A series of adjoining service hangars, separated by blast doors, contained hundreds of the cloaking device-equipped starfighters mounted on racks along the walls. Mechanical arms were used to remove each TIE Phantom from its rack ready to launch or undergo maintenance. The fighters could be moved around the ship suspended from ceiling-mounted rails which ran through cavernous rooms crisscrossed by walkways and retractable bridges. Additional hangars were located on both sides of the ship to allow access for shuttles and other vessels. In addition to the TIE Phantoms stationed aboard the Terror, at least one of these hangars had facilities to store a number of TIE interceptors mounted from its ceiling.
The Terrors bridge, situated in the command tower, featured two crew pits separated by a walkway leading to the large forward viewports. The ship was fitted with a meditation chamber for use by the Dark Lord of the Sith Darth Vader. This pressurized spherical chamber contained equipment to allow the Sith Lord to quickly remove and replace his helmet. The Star Dreadnought had its own sewer system, comprising a network of interconnected tunnels in which waste material ran beneath walkways. The sewers could be entered via access panels in the floor of the above deck.
The ship's main reactor was located in a circular chamber surrounded by beam focusers which prevented it from going critical. The reactor could be accessed through a series of large tunnels throughout the superstructure. The tunnels, which were filled with moving machinery and periodically divided by force fields powered by shield generators, were large enough for a starfighter to fly through. At least one such tunnel from the reactor core led outside the ship.
The Terror was one of several Super Star Destroyers constructed by the Galactic Empire during the Galactic Civil War and entered service under the command of Admiral Sarn by 3 ABY. For some years, Grand Admiral Martio Batch had been working to develop a practical cloaking device at his research facility on the moon Imdaar Alpha. Cloaking devices had once been common, powered by stygium crystals mined from Aeten II in the Dreighton Nebula. After the mines ran dry, the technology fell out of use until Batch used the Empire's Tarkin superweapon to destroy Aeten II, releasing thousands of stygium crystals into space. Batch set about using the crystals to produce a fleet of cloaked starfighters—modified V38 assault fighters known as TIE Phantoms. The Grand Admiral requisitioned the Terror to serve as command ship of a fleet comprising at least two Imperial-class Star Destroyers protecting the project. The Star Dreadnought was itself fitted with a cloaking device and equipped to serve as a carrier for the TIE Phantoms.
The Terror's destruction
Following the Imperial victory over the Alliance to Restore the Republic at the Battle of Hoth in 3 ABY, the Dark Lord of the Sith Darth Vader visited the Terror to oversee the final field tests of the new starfighters. Vader observed from aboard the Star Dreadnought as TIE Phantoms from Sigma Squadron intercepted and destroyed a flight group of Rebel X-wings patrolling the region of space known as the Dreighton Triangle. When the field tests were complete, the Dark Lord ordered Sarn to take the Terror back to Imdaar Alpha to begin the final preparations to launch the TIE Phantom fleet against the Rebellion.
The Rebel Alliance learned of the Empire's plans and dispatched pilots Ru Murleen and Rookie One to Imdaar to infiltrate the Terror and steal a TIE Phantom for study. As the Terror arrived at Imdaar and prepared to dock with Batch's cloaked facility, the Rebels approached in a supply shuttle stolen from the supply base on the planet and were permitted to dock. The intruders were soon discovered but used the Terrors sewer to evade capture and reach a service hangar where they boarded a TIE Phantom. The Imperials quickly closed the outer bay doors to prevent their escape, but the Rebel pilots flew the stolen fighter through the Star Dreadnought's superstructure to its main reactor, destroying the beam focusers surrounding it before making their escape. As the Terrors reactor began to overload, Vader executed Sarn for his failure before fleeing the doomed Star Dreadnought. The reactor blew soon after, destroying the Terror. The explosion caused the TIE Phantom factory to become visible, allowing the Rebels to fly inside and destroy it, bringing the TIE Phantom project to an end.
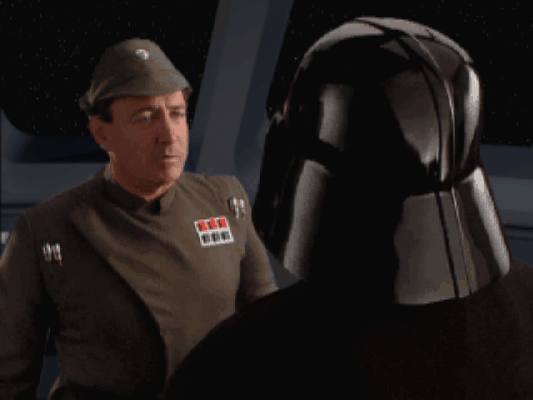
Admiral Sarn and Darth Vader on the Terror's bridge
During its involvement with the TIE Phantom project, the Terror was commanded by Admiral Sarn under the overall command of Grand Admiral Martio Batch, one of the most senior officers in the Imperial Navy. As the field testing of the new starfighters neared completion, the Dark Lord of the Sith Darth Vader assumed overall command of the project, operating from aboard the Terror. The Star Dreadnought's crew included numerous stormtroopers and pilots, along with various models of droid, including MSE-6-series repair droids, R2-series astromech droids and remotes.
The Terror was created by Vincent Lee for the 1995 LucasArts video game Star Wars: Rebel Assault II: The Hidden Empire. The Terror is only described as a "command ship" in the game and is identified only as a Super Star Destroyer in later sources. However, The Essential Guide to Warfare identifies this as a term covering several classes of vessel and is one of several sources to identify ships of the Terrors design as Executor-class Star Dreadnoughts.
- "Game Room: Rebel Rouser" — Star Wars Galaxy Magazine 5
- "New Horizons" — Star Wars Adventure Journal 9
- "Who's Who: Imperial Grand Admirals" — Star Wars Insider 66
- The Complete Star Wars Encyclopedia
- Rebellion Era Campaign Guide
- The Essential Guide to Warfare