A skirmish took place both aboard and in the space outside of The Wheel space station in 137 ABY. Although fought between members of the Empire-in-exile and Galactic Alliance Remnant, it was engineered by agents of the One Sith and Darth Krayt's Galactic Empire, whose machinations served to disrupt a potential alliance between Empire-in-exile and Remnant forces. The skirmish came about due to a meeting aboard the station between Remnant Admiral Gar Stazi and Empire-in-exile Captain Mingo Bovark, who were discussing the idea of combining their organizations' strength against Darth Krayt's forces in the ongoing Second Imperial Civil War. Sith–Imperial agents Jor Torlin and Morrigan Corde were concurrently on the station, hunting for the former Jedi Cade Skywalker, whom Krayt sought.
After determining that Skywalker was no longer aboard, Torlin and Corde decided to disrupt the negotiations through sabotage. Using Command Override Limpet Droids, Torlin remotely took control of a turbolaser aboard Bovark's shuttle and fired at the nearby Remnant shuttle. When news reached Stazi, he attacked Bovark with a vibro-shiv, while a lightfight erupted outside of their conference room between Stazi's bodyguards and Bovark's Imperial Knight protectors, Antares Draco and Ganner Krieg. Draco was able to rescue Bovark, but the Imperials' escape was blocked by Wheel Administrator Pol Temm and the Wheel Security Force. Temm barred all of Fel's forces from the station, and the Empire-in-exile remained devoid of allies.
In the year 137 ABY, Darth Maladi of the One Sith assigned her agent Jor Torlin to find Cade Skywalker, a former Jedi whose healing powers were sought by Maladi's Master, Darth Krayt. Torlin tracked Skywalker to The Wheel, a space station in the Besh Gorgon system, as did Moff Nyna Calixte of Darth Krayt's Galactic Empire. Hoping to gain leverage over her Sith superiors, Calixte went to The Wheel disguised as her secret alter-ego, Imperial Agent Morrigan Corde.
The year 137 ABY also saw Emperor Roan Fel of the Empire-in-exile retake the fortress world of Bastion from Krayt's forces. Fel had been making guerrilla strikes against Krayt's Empire for seven years in the ongoing Second Imperial Civil War, and he hoped to keep his capture of Bastion—which he believed would render him a more potent threat—a secret while he drew more strength to it. The news reached Krayt through members of the Sith–Imperial–loyal Imperial Mission, but Fel placed the blame on two of his Imperial Knights, Antares Draco and Ganner Krieg. The two had departed Bastion to rescue Fel's daughter, Marasiah, from the clutches of the Sith, and Fel assumed that they had been tracked back to the fortress world.
Believing that he now had a stalemate against Krayt's Empire, Fel sent Captain Mingo Bovark to propose an alliance to Admiral Gar Stazi of the Galactic Alliance Remnant—which also opposed Krayt's Empire—aboard The Wheel, which was well-known for its neutrality. Draco's and Krieg's punishment was to act as Bovark's bodyguards. The Knights and Stazi's three Galactic Alliance Intelligence officers all contravened Wheel policy by smuggling weapons aboard, and both sets of guards waited outside of a conference room, where Bovark and Stazi negotiated. Elsewhere on The Wheel, Corde established contact with Torlin, and the two determined that Skywalker had already left the station. Corde had additionally learned of the meeting between Bovark and Stazi, and she suggested that they disrupt it before pursing their target any further.
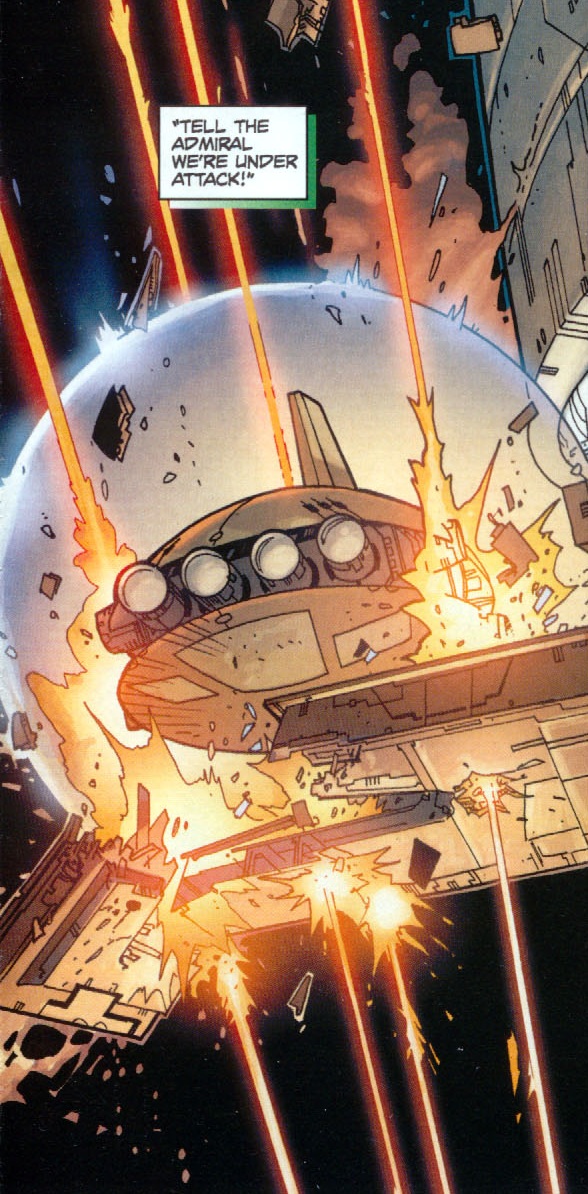
The Galactic Alliance Remnant's shuttle comes under attack.
While planning aboard his personal ship, the Raider, Torlin proposed calling in the Imperial Navy, but his counterpart was insistent that they play on Bovark's and Stazi's mutual suspicions of each other rather than presenting a common enemy. Torlin accordingly produced six Command Override Limpet Droids, devices that could adhere to the exterior of a starship and override its onboard computer. The Empire-in-exile's Nune-class Imperial shuttle was docked close to the Galactic Alliance Remnant's Crix-class diplomatic courier shuttle, and Torlin remotely directed the droids through space before attaching them to the Imperial ship, where they took control of a turbolaser battery. The Imperials aboard were unable to override, and Torlin blasted the Remnant shuttle, whose crew raised their shields and returned fire. The Imperials' own shields went up as the two shuttles continued their salvos, and Stazi was informed of the situation via comlink.
In the conference room, Stazi drew a vibro-shiv from his robes. Although the Captain frantically tried to convince the Admiral that a misunderstanding had occurred, Stazi's distrust of Imperials caused him to strike and draw blood from a slash at Bovark's side. The Alliance officers meanwhile initiated a lightfight in the hallway, and the Imperial Knights used their lightsabers to deflect their attackers' blaster bolts. Krieg took up the defense single-handedly as Draco cut his way through the conference room door and telekinetically shoved Stazi into a wall with the Force before retrieving the injured Bovark. Bovark's wound was only skin-deep, but the Imperials' escape was halted by Wheel Administrator Pol Temm and four members of the Wheel Security Force. Temm demanded that the Imperial Knights surrender their weapons, but Draco refused, adamant that the Captain be safely returned to his shuttle. The Administrator consequently barred all of Fel's forces from the station; Draco suspected sabotage and vowed to find whomever was responsible.
After Torlin's droids detached themselves from the Imperial shuttle, their circuits fused and they became space junk. He and Corde then departed The Wheel to search for Skywalker on the planet Ossus, location of the former Jedi Academy. Once on the jungle world's surface, Torlin attacked Corde out of mistrust and a conviction that he would be safer if she were dead. Only Corde survived the encounter. Later in the year, when Skywalker was captured by the Sith, Nyna Calixte pointed to "Morrigan Corde's" success in sabotaging the negotiations aboard The Wheel when convincing her co-conspirator, Grand Admiral Morlish Veed, that Corde should be the one to retrieve Skywalker from Krayt's clutches and give them the leverage they needed in their scheming against the Sith. Admiral Stazi remained distrustful of the Empire-in-exile until the Imperial Knights Treis Sinde and Sigel Dare risked their lives to rescue Alliance pilots held prisoner by the Sith–Imperials on the ocean planet Dac, and to personally warn him of explosives that they had planted on the Sith–Imperial Star Destroyer Imperious prior to his capture of it during a battle over the water world. Only then did the Admiral decide to resume negotiating an alliance with Fel against a common foe.
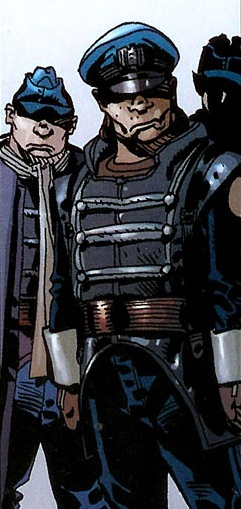
The Alliance bodyguards from the skirmish were later identified as Galactic Alliance Intelligence officers.
The skirmish on The Wheel occurs in the tenth issue of the Star Wars: Legacy comic series, which was written by John Ostrander, penciled by Colin Wilson, and released in March 2007. The issue's cover art, done by Dave Ross, depicts the skirmish differently than what occurs within the comic's pages. In Legacy 10, Antares Draco and Ganner Krieg battle Alliance bodyguards whose uniforms were later attributed to Galactic Alliance Intelligence officers in 2009's Legacy Era Campaign Guide, whereas the cover art puts two of the guards in armor similar to that worn by Galactic Alliance Infantry Troopers in the Campaign Guide. The cover art also depicts the lightfight between the Alliance guards and Imperial Knights as spilling into the conference room, where Draco Force-pushes one of the guards out of Bovark's way. However, the issue has just Draco entering the conference room and Force-pushing Gar Stazi while Krieg and all three Alliance guards remain in the hallway.
- Star Wars: Legacy (2006) 0½
- The Complete Star Wars Encyclopedia, Vol. II, III
- Legacy Era Campaign Guide
- The Essential Atlas