Death Squadron was a naval squadron of the Imperial Navy that served as the personal armada of the Sith Lord Darth Vader, the right-hand of Galactic Emperor Sheev Palpatine of the Galactic Empire. Following the Battle of Yavin, the Death Squadron was led by the Executor-class Star Dreadnought Executor, typically supported by five smaller Imperial-class Star Destroyers. One of those support ships was the Devastator, which had been the Lord Vader's flagship before the Executor and had participated in the capture of Princess Leia Organa.
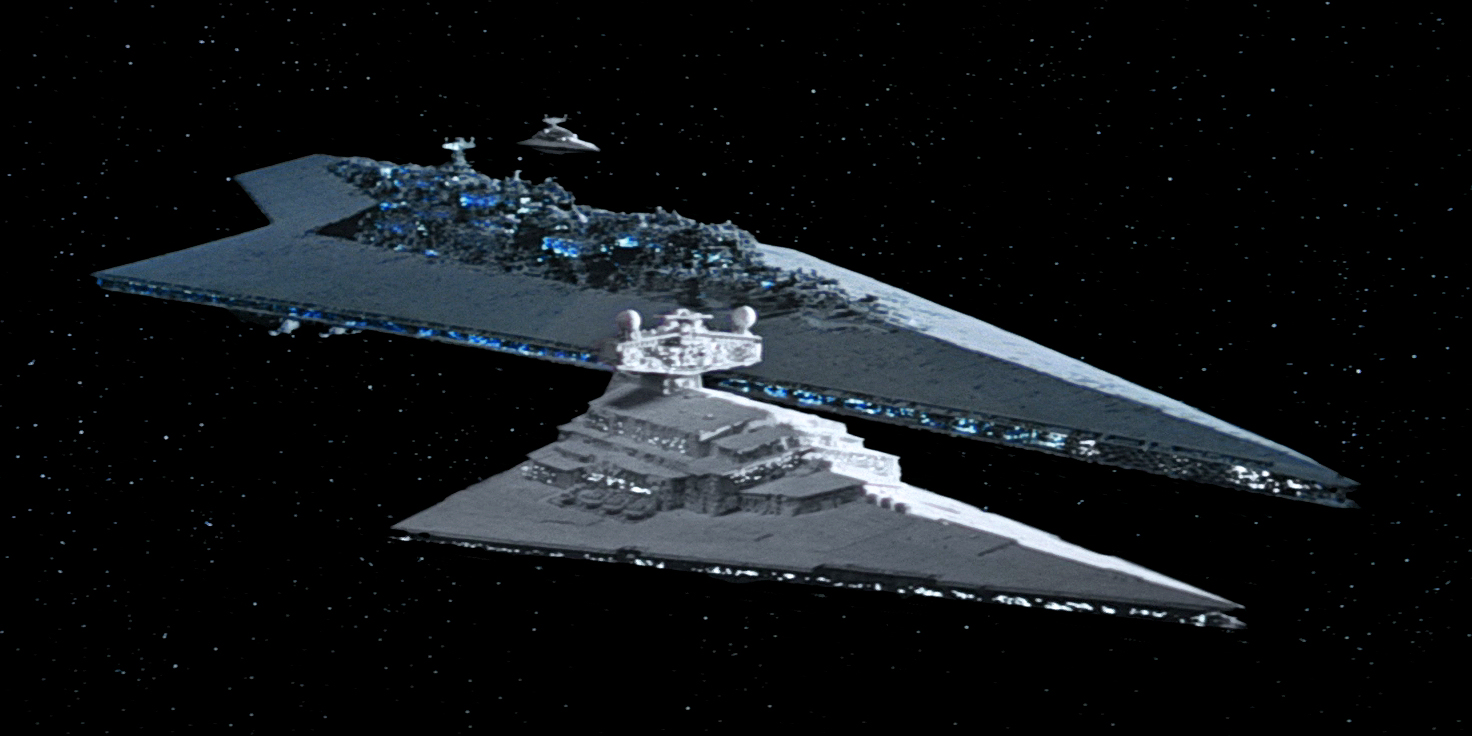
Death Squadron was led by the Executor.
The Imperial Navy's Death Squadron typically consisted of one Executor-class Star Dreadnought as its command ship, the Executor, as well as five Imperial-class Star Destroyers, including the upgraded Imperial I-class Star Destroyers Conquest and Devastator, as well as the Imperial II-class Star Destroyers Avenger, Tyrant, and Ultimatum. The Imperial II-class Star Destroyer Stalker was attached to Death Squadron prior to the Battle of Hoth.
As acting Commander-in-Chief, Darth Vader could requisition any Imperial ship to join his fleet, and could be attached such as the Stalker. The Devastator had been the Dark Lord's flagship before the Executor, and had been refitted on multiple occasions to keep it up-to-date. Death Squadron also featured at least three Arquitens-class command cruisers and multiple Imperial Gozanti-class cruisers.
Death Squadron was under the command of Vader and Fleet Admiral Firmus Piett, who replaced Admiral Kendal Ozzel after the latter's execution. Other officers within the armada included Admiral Jhared Montferrat, Commodore Rae Sloane, and Star Destroyer captains Canonhaus, Lennox, and Lorth Needa. Death Squadron's ground forces included the 1st Legion and the 501st Legion. Although the Squadron had multiple generals, General Maximilian Veers commanded the 501st's Blizzard Force at Hoth.
During the Galactic Civil War, Death Squadron was the personal fleet of Darth Vader. Following the Battle of Yavin, where the Empire lost its Death Star battle station to the Rebel Alliance, the fleet's leading officer, Admiral Kendal Ozzel, tried to convince the Lord Vader to bring Death Squadron to bear immediately to destroy the rebellion. However, his superior rejected this direct approach, agreeing with another of Death Squadron's officers, General Maximilian Veers, in that the Alliance was not suitable for such an extermination. Instead, Lord Vader used his agent, Queen Trios, to infiltrate the rebels' command structure, allowing her to provide the location of their own fleet as it finished completion.
Death Squadron arrives at Mako-Ta
When Lord Vader's pawn, Queen Trios, informed him of the elusive Alliance Fleet's location, Death Squadron was sent to attack the Mako-Ta Space Docks. At first, the Sith Lord ordered the flotilla's cruiser to hold their fire as the rebels attempted to ascertain their situation. The Squadron opened fired on the rebels' cruisers and started with General Vanden Willard's flagship, Yavin's Hope. The Squadron continued to attack and destroy several more of the Rebels' cruisers.
Death Squadron then spotted the arrival of the Millennium Falcon and sent in TIE fighters, along with the Dark Lord's personal advanced TIE to pursue it. The flotilla also destroyed several rebel escape pods. However, Princess Leia Organa was able to get some codes from the armada's flagship, the Executor, that were able to restore the systems aboard General Jan Dodonna's ship, the Republic. The other rebel commanders were able to use the codes to jumpstart their cruisers and escape. The Republic was immobilized, but covered the retreating rebel fleet before it was destroyed with all hands.

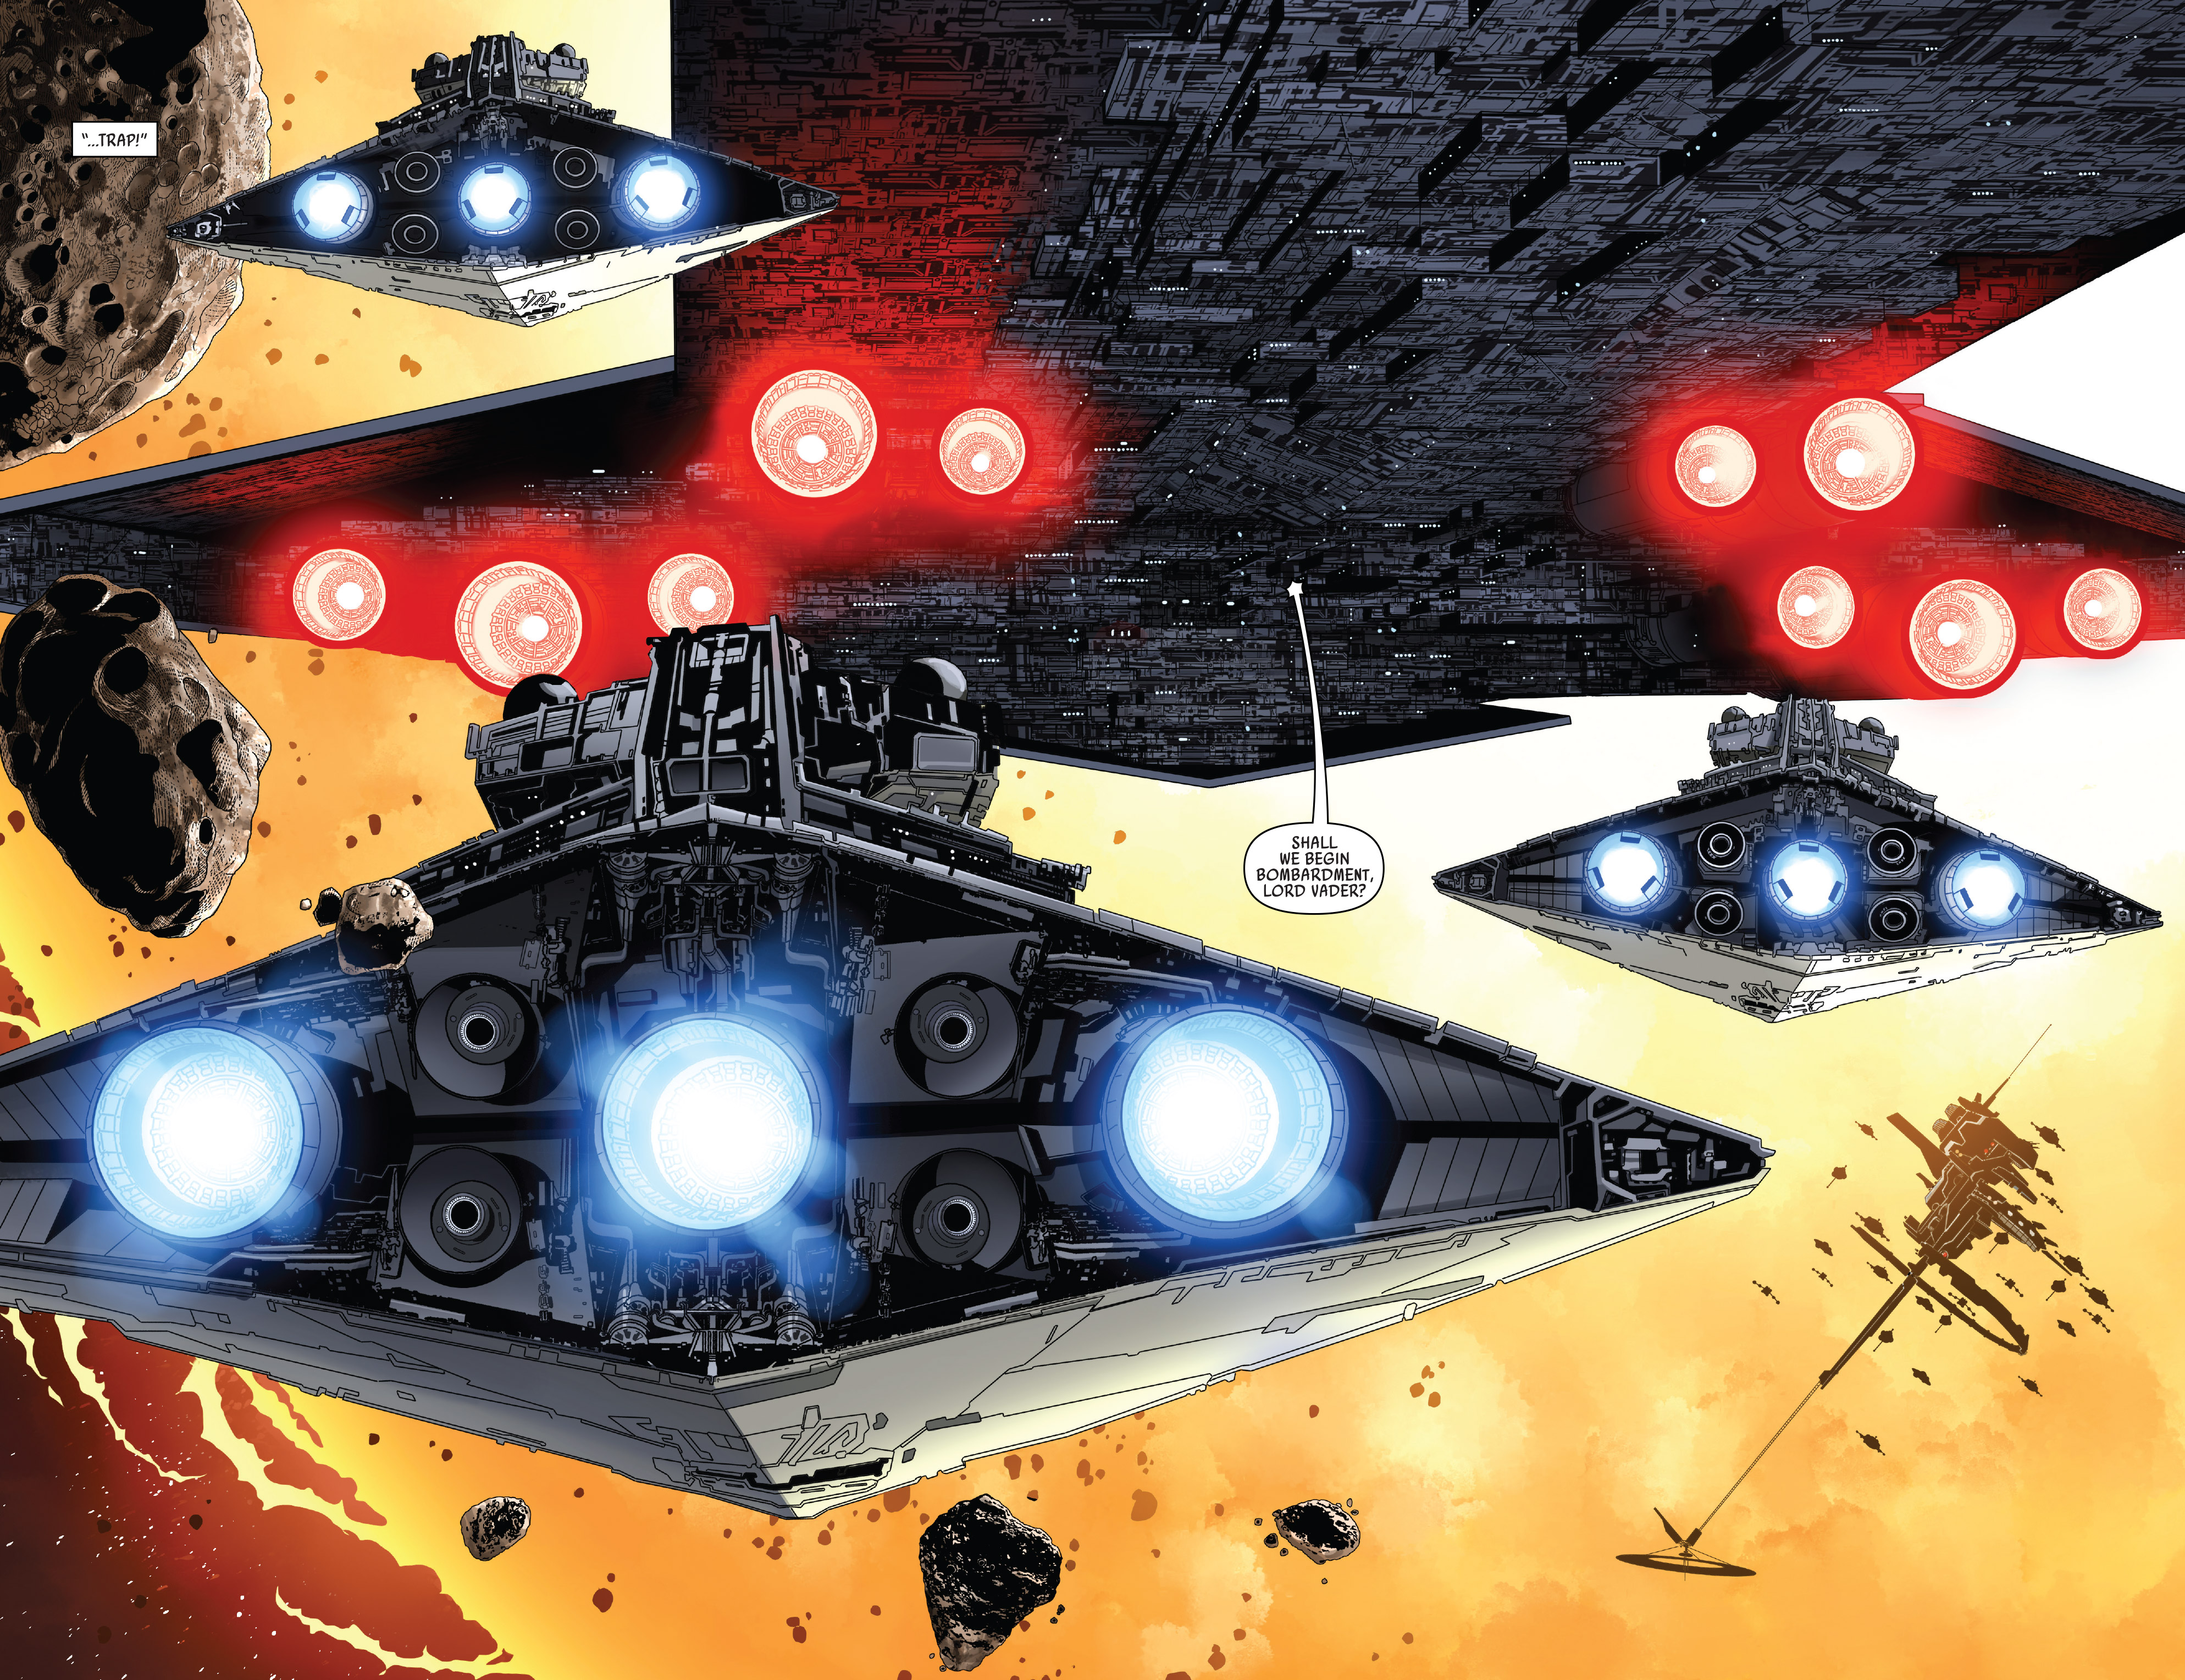
Vader's fleet preparing to assault the rebel force at Hoth
While Death Squadron was in the Juris sector, a probe droid found the Rebels' base in the Hoth system. Lord Vader ordered the Squadron to Hoth. However, erroneously thinking to surprise the rebels, his second in command ordered the fleet to emerge from hyperspace too close to to the system. Lord Vader, angered by Admiral Ozzel's incompetence, Force choked him to death and and promoted his junior, Captain Firmus Piett, to Admiral as his replacement. As the Millennium Falcon fled Hoth and entered an asteroid field, Captain Lorth Needa deployed the TIE fighters of Theta Squadron to patrol the area. Although the pilots disobeyed orders and entered the field, they did not face retribution for their actions after Captain Needa faced execution at the hands of Lord Vader's invisible grip for letting their quarry escape. While Death Squadron was chasing the Falcon through through the asteroid field, every ship suffered damage, and the Ultimatum was destroyed along with another Star Destroyer.

Star Destroyers of Death Squadron in defensive orbit of the second Death Star over Endor.
A large fleet, including Death Squadron and the Moddell sector fleet participated in the decisive Battle of Endor. The rebellion, having located the second Death Star, attempted to destroy it. However, it was anticipated that the rebels would attack, and Death Squadron executed an ambush once they arrived at the moon. Towards the end of the engagement, the Executor and Death Star II were destroyed and both Emperor Palpatine and Lord Vader were killed.
Death Squadron first appeared in the 1980 original trilogy film, Star Wars: Episode V The Empire Strikes Back. It was first given its name in the new Star Wars canon on StarWars.com's Encyclopedia entry for the Super Star Destroyer.
- LEGO Star Wars: The Freemaker Adventures — "Return to the Wheel"
- LEGO Star Wars: The Freemaker Adventures — "Return of the Return of the Jedi"