A battle was fought on Zanbar between the Death Watch forces of the Shadow Collective and the Confederacy of Independent Systems during the Clone Wars. The battle followed Maul's escape from Sith imprisonment on Stygeon Prime, and was the result of a Sith ploy to use Maul to lure the Dathomir witch Mother Talzin out of hiding so she could be destroyed.
With plans to engage Maul enough for him to seek out Talzin's help, the Sith Lord Count Dooku sent General Grievous and Separatist forces to Zanbar, where Maul and his rescuers rendezvoused after the prison break. Grievous launched all of his forces against Maul and the Mandalorians, knowing that Mandalorian warriors would not be easily beaten. Maul and Grievous met in single combat, while the two armies collided and suffered heavy losses. By the battle's end, Maul ordered his forces to retreat, while the Sith waited for him to find Mother Talzin.
During the Clone Wars, Maul allied himself with the Mandalorian splinter faction Death Watch as part of Maul's Shadow Collective. Together, they took control of Mandalore, with Maul becoming its leader. Shortly thereafter, however, Maul was captured by his former Sith master, Darth Sidious, and imprisoned on Stygeon Prime. Sidious intended to use Maul as bait to lure Mother Talzin, a Dathomir witch and enemy of the Sith, out of hiding so she could be destroyed. Sidious also wanted to learn more about the Shadow Collective and the power Maul had amassed.
On the orders of Mandalore's Prime Minister, Almec, two Death Watch warriors, Rook Kast and Gar Saxon, pursued the Sith to Stygeon, where they intended to rescue Maul from Separatist captivity. The two were able to free Maul after he had been interrogated by the Sith Lord Count Dooku, and together the three rendezvoused with more Death Watch forces on the moon of Zanbar. Maul took command of his forces once again, and assured them that the war they had longed for was at hand.
Maul was tracked to Zanbar by General Grievous, the leader of the Separatist military, and a Separatist fleet. Dooku ordered Grievous not to kill Maul, simply to defeat and wound his forces enough that Maul would seek out Mother Talzin's help. Grievous launched his forces towards the surface, and Maul's troops immediately began firing anti-aircraft weaponry at them. The heavy fire was not enough to repel the ships, however, so the Separatists pressed their attack and deployed all of their forces. Grievous knew that they would be fighting powerful Mandalorian warriors, and that the odds were stacked against the Separatist army.
Maul and Grievous engage in single combat.
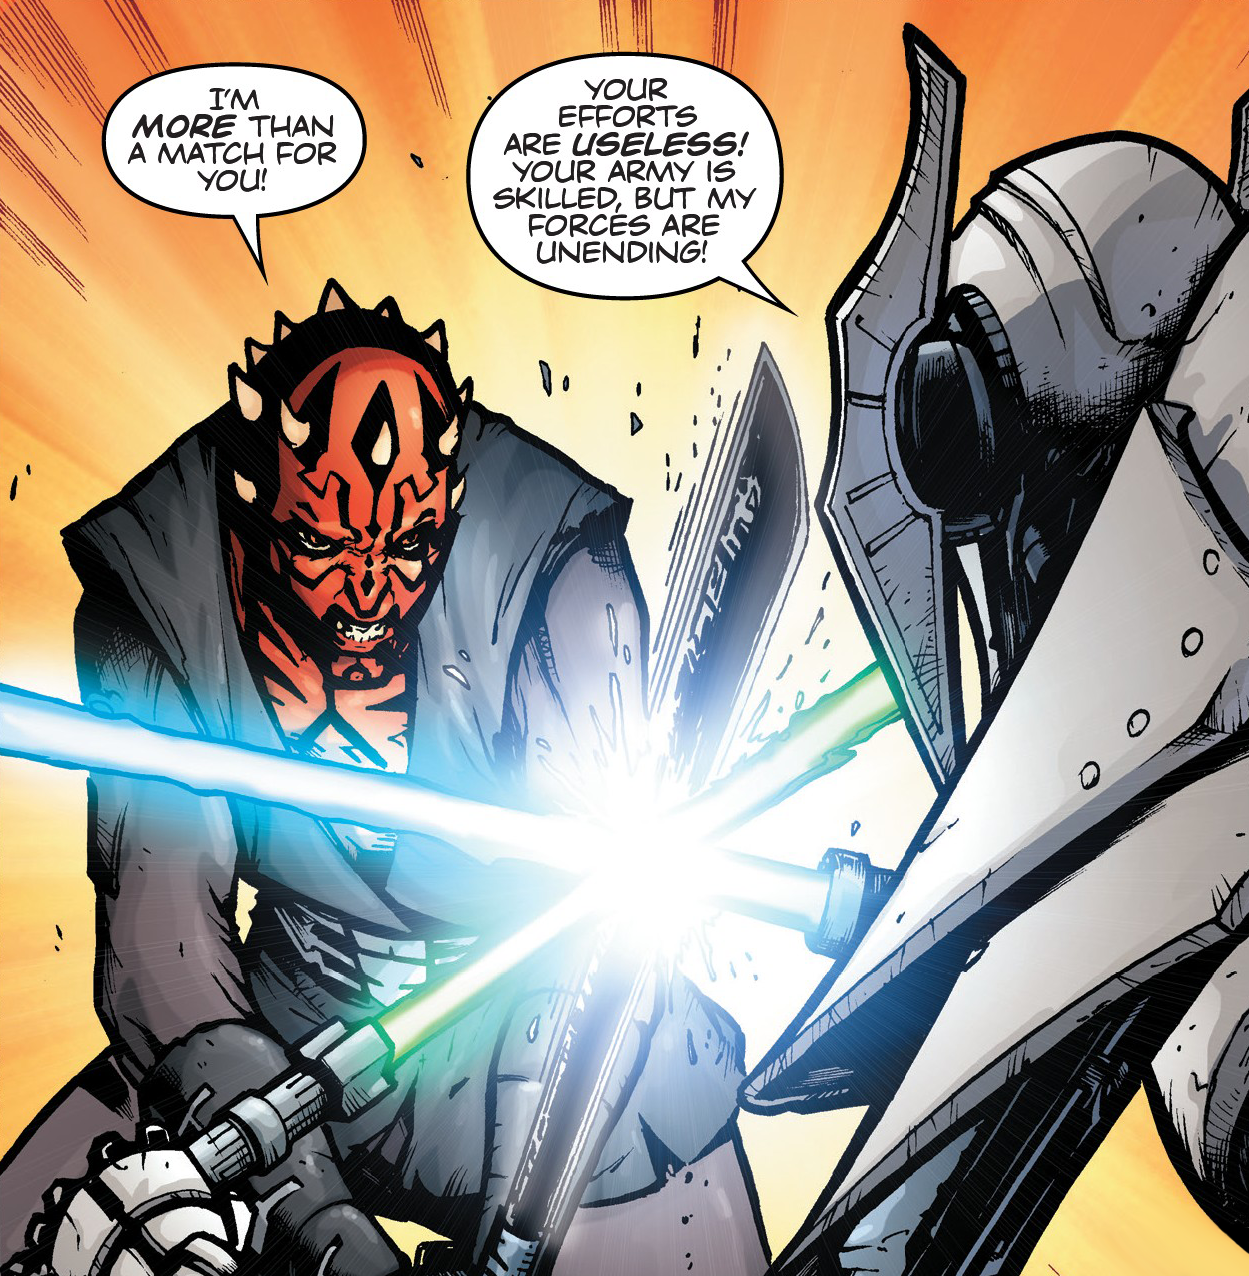
The forces that landed engaged the Mandalorians in battle. Grievous sent a number of his droids against Maul and Death Watch, and Maul made quick work of those whom he personally fought. Grievous also entered the battle, taking on Death Watch forces and killing at least one Mandalorian himself. As he did so, Grievous was attacked by Maul, who engaged the cyborg general in single-lightsaber combat; Grievous was armed with two lightsabers, while Maul used his Darksaber.
As the two leaders engaged one another, Grievous taunted Maul about the battle droid onslaught, making Maul realize that his forces were being crushed. Grievous then seized the upper hand in their duel, kicking Maul backwards; the latter then recognized that he was losing the battle and sent in his Gauntlet fighters, which firebombed the battlefield and destroyed many of the Separatist battle droids. Maul used the chaos to his advantage by escaping onto one of the fighters, before ordering his surviving forces to retreat.
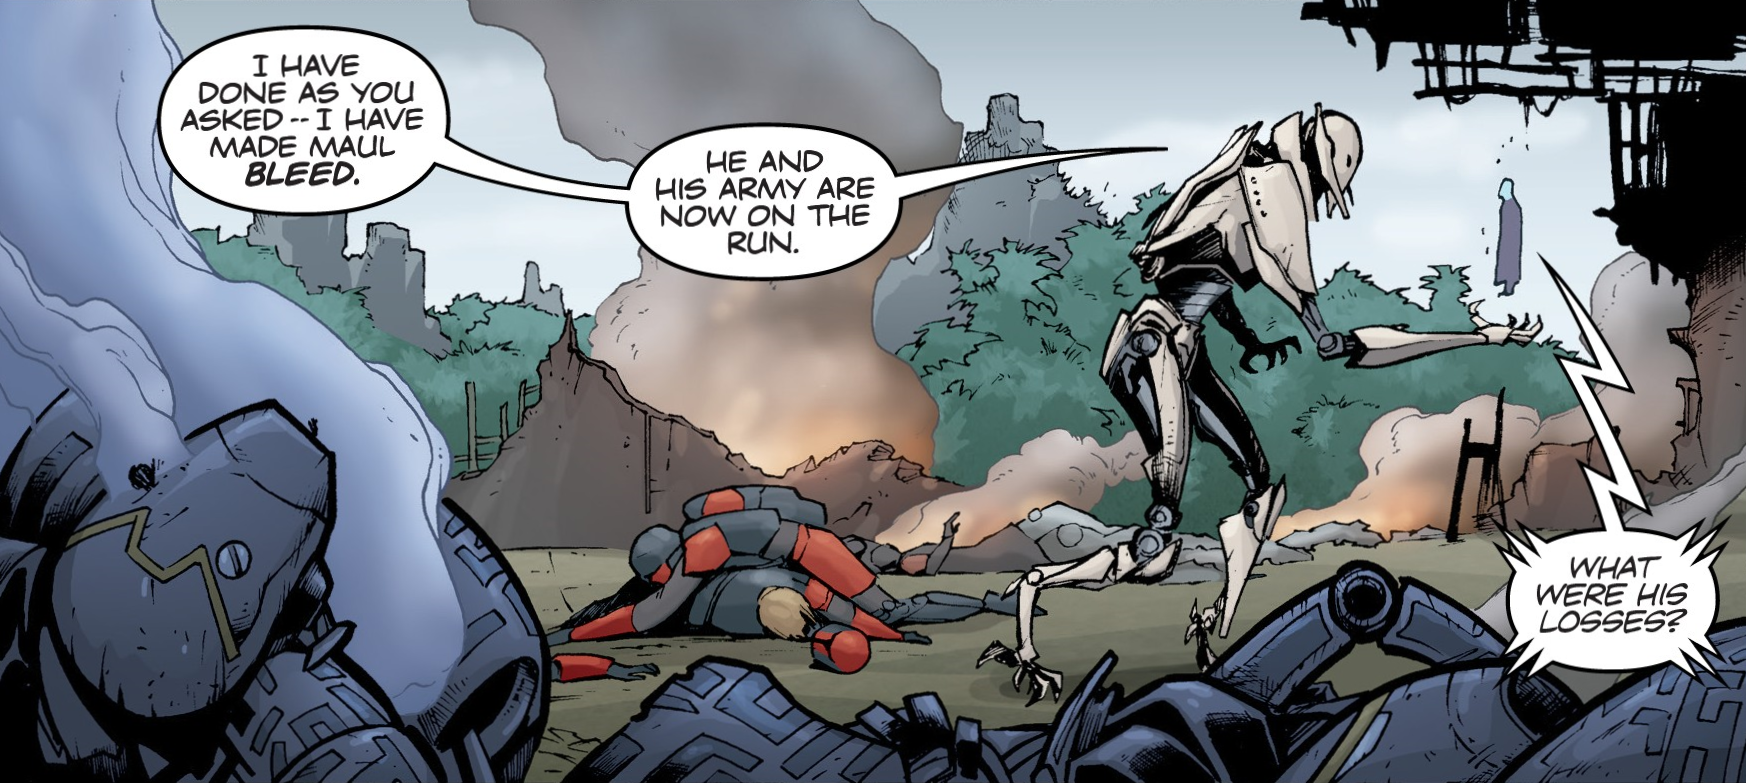
Even though both sides took heavy losses, Maul was forced into a retreat.
The Separatists suffered heavy losses, losing most of their droids in the battle. At the battle's end, Grievous contacted Count Dooku and informed him of the battle's outcome. Dooku informed him that these were acceptable losses, as Maul had to believe that the Sith and Separatists were attempting to destroy the Shadow Collective so he would seek out Mother Talzin.
- Star Wars: The Clone Wars: Character Encyclopedia - Join the Battle!
- Star Wars: Timelines