
The Rebels engaging the Suprosa.
The Rebel Alliance against the Galactic Empire was in a desperate struggle after the loss of its base in 3 ABY, and rumors began reaching Alliance High Command about the construction of a larger, more power Death Star superweapon. The Bothan Spynet received a tip from the Black Sun criminal organization that the Death Star II plans were being secretly transported on a freighter, the Suprosa. The Alliance had also successfully destroyed the Super Star Destroyer Vengeance during the Battle of Nocto although they suffered heavy casualties including several B-Wing starfighters. Commander Luke Skywalker, along with the smuggler Dash Rendar, traveled to Bothawui and met their contact Koth Melan in 3.5 ABY to train the Bothan's Blue Squadron to intercept the freighter. There was a vacancy, and Rebel pilot Ace Azzameen was assigned to the raid. The Rebels intercepted the freighter, which was heavily armed, and lost six ships in the raid. Skywalker disabled the freighter, and Rendar boarded and took the data core containing the plans. The plans were then brought to the Bothan colony Kothlis.
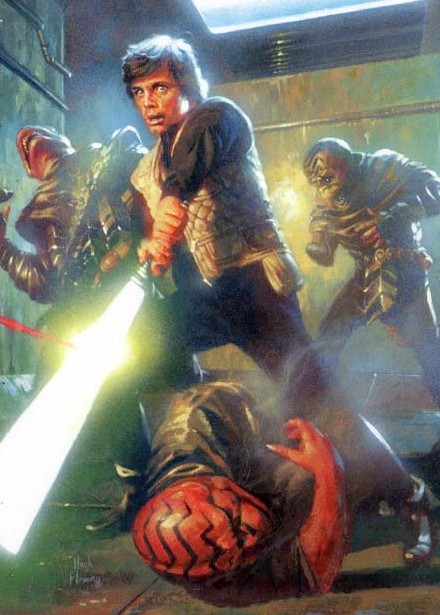
Luke Skywalker defending against Barabel attackers.
Bothan technicians began decoding the data in a Bothan Spynet safehouse down on the planet, but the Imperials tracked the computer to Kothlis. After a Bothan technician was close to decoding the computer core, the safehouse's door exploded. The building was attacked by a team of bounty hunters looking for the bounty on Skywalker. As fire was traded in the storehouse, Melan fell to blaster fire while Skywalker used his lightsaber to defend himself. A Bothan grabbed the computer and ran off, and Luke was captured by the Barabel Skahtul. The technicians managed to take the data core away.
The data managed to reach the CR90 corvette Razor in orbit around Kothlis. As the freighter proceeded to rendezvous with the Alliance Fleet, the Imperial I-class Star Destroyer Motivator jumped out of hyperspace and deployed its contingent of TIE fighters and interceptors, and managed to secure the Razor in a tractor beam.
At that time, Rebel reinforcements which were supposed to rendezvous with the corvette decanted from hyperspace. Rogue Squadron, flying three B-wing starfighters, four T-65B X-wing starfighters, and three RZ-1 A-wing interceptors, escorted the medical frigate Redemption. The Rebels noticed the Star Destroyer, and Rogue Leader Wedge Antilles ordered his wingmen into battle, telling them to concentrate on the Destroyer's shield generators. He also told the X-wing and A-wing groups to attack the TIE fighters.
During the battle, Rogue Squadron spotted a Lambda-class shuttle preparing to dock with the Motivator. Wedge Antilles then took out the shuttle, and proceeded to recover a supply of advanced proton bombs.
The Rogues skirmished with the TIE starfighters, and Antilles destroyed the ion cannons facing the Redemption. The captain reported that the frigate was under attack, and Antilles commed the Rogues, ordering them to protect the frigate at all costs. He was also able to cause additional damage to the Destroyer. Pressing the attack, he took out the bridge deflector shields and the reactor. The Motivator then started to move into a position to jump to hyperspace with the Razor still in its hangar bay, but Antilles approached on a vector and took out the command deck.
The Star Destroyer then started a slow plummet to the surface as Rogue Squadron strafed the ship. Antilles suggested that they contact Alliance command for support, specializing that they had to go down to the surface of the planet.
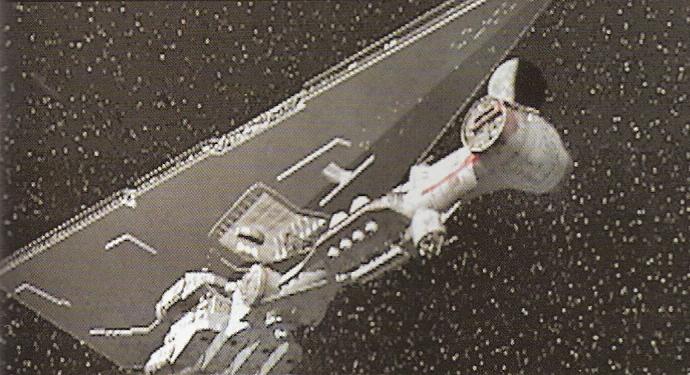
The Motivator capturing the Razor
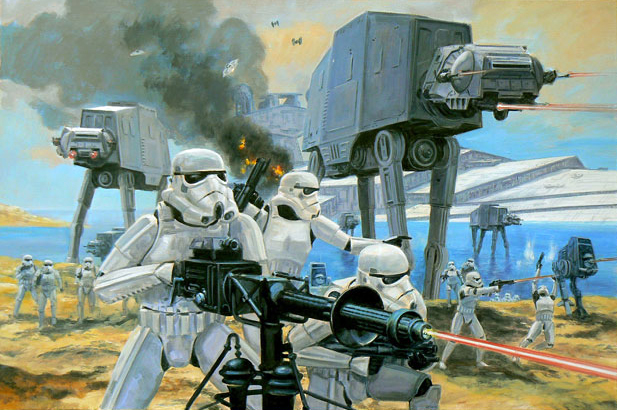
Imperial forces battle near the grounded Star Destroyer.
As the Star Destroyer crashed into the surface, the surviving crew set up defenses. An Alliance GR-75 transport carrying Crix Madine and a company of commandos subsequently arrived to secure Razors computer core. As three of Rogue Squadron's X-wing starfighters escorted the transport to the crash site, Madine contacted them to provide support. The transport was under fire from several TIE squadrons. The Rebels were surprised to find a portion of the Star Destroyer's ground forces had survived the crash. Madine, after discovering that the Motivator's core was increasing in temperature, and was most likely going to go critical within minutes, was forced to land the transport on the nearby beach as he was unwilling to risk trying to get close to the doomed Star Destroyer.
Still-operational AT-ATs and AT-PTs blasted their way through the Star Destroyer's hull and began to attack the Rebel transport. The transport deployed three T-47 airspeeders, and Rogue Squadron landed and switched craft. They then used their harpoon and tow cables to trip up the AT-ATs, concentrating on the foremost walker, which was in the shallowest water.
During the battle, Wedge Antilles noticed an object within a small hole of what remained of the Motivators command bridge. He briefly broke away from the battle and ended up picking up a supply of homing proton torpedoes.
While Rogue Squadron provided covering fire and targeted the armored vehicles, Madine and his commandos engaged in a firefight with stormtroopers and their E-web blaster nests. Antilles and the Rogues then switched to four BTL-A4 Y-wing starfighters at the transport and started bombing the AT-PTs which were approaching under the surf.
After neutralizing any remaining functional batteries and destroying the Imperial armor, Rogue Squadron covered Madine's charge to the Star Destroyer. Madine informed Antilles when the last of the walkers were destroyed. The ground troops took orders from the Rogues during their attack. Eventually, Madine reported they had spotted weak spots in the Star Destroyer's hull, and Rogue Squadron then proceeded to bomb the weak point to grant him and his men entry to the Star Destroyer.
Madine and the commandos succeeded in retrieving the data from Razor, and the transport took off and circled around, and the surviving commandos boarded the transport as it landed. The Rebels fled Kothlis while Rogue Squadron engaged pursuing TIE fighters. The information—the Death Star II plans—was later delivered to Alliance leader Mon Mothma.
The information collected from the data core, coupled with other information collected by Rebel agent Tay Vanis, convinced the Alliance High Command of the reality of the new Imperial battlestation. Alliance High Command ordered the fleet to disperse to discover more information. Skywalker was later able to escape the bounty hunters by using his Force powers, and joined up with Lando Calrissian. The Alliance later launched an attack on the under-construction battlestation. Although the capture of the plans was part of a trap laid by Emperor Palpatine, the battle resulted in his death, the redemption of Darth Vader, and the destruction of the superweapon.
The battle of Kothlis first appeared in 1995 in Star Wars: TIE Fighter Collector's CD-ROM during the mission titled 'Strike on Kothlis' at which point the Empire captures the Kothlis II, a space station in orbit around Kothlis. The next appearance was in 1996 with the Shadows of the Empire multimedia project. A quote from that chapter of the novel includes a reference to THX-1138. There are two conflicting sources for the capture of the Razor. The battle as described above is the storyline as it appeared in the 2001 video game Star Wars: Rogue Squadron II: Rogue Leader in two consecutive missions: Razor Rendezvous and Vengeance on Kothlis. In the 1999 video game Star Wars: X-Wing Alliance the story goes a little different, though the outcome is the same. This article follows the Star Wars: Rogue Squadron II: Rogue Leader version, as it is the later source, and was pictured in the art book Star Wars Art: Visions.
The surviving Bothan spies flee from Kothlis on Fey'lya's Pride, with the stolen Imperial computer to Kothlis II. Around that time, Darth Vader's Death Squadron has arrived and begun it's attack on Kothlis II, where the computer is transferred on to the Razor. Under covering fire from Liberty the Razor makes it safely to hyperspace.
While en route to its rendezvous with the Independence, the Razor, has come under attack by an Imperial pursuit group. The corvette is eventually captured by the Avenger, but managed to launch an escape pod which is picked up by the civilian Dreadnaught Mercury. Mercury escaped to hyperspace to rendezvous with the Independence. While transferring the escape pod to the Independence the Avenger and the Executor emerge from hyperspace and begin their attack. The Mercury and Independence manage to escape once more and thus finally securing the Death Star II plans in the hands of the Alliance.
In Rogue Squadron II: Rogue Leader, any damage performed to the Star Destroyer in the first mission carries over to the next mission. This article assumes the player took out the ion cannons to protect the Redemption. At the end of the mission, the player can deliver the coup-de-grace on the Motivator by performing a kamikaze run on the ship, the requirements of the mission stated the player can still get a Gold Medal if they only lose one life, and the Rebel Strike Official Nintendo Strategy Guide suggests that the player does so to finish the mission with a Gold Medal. This article assumes the player did not do so, as Antilles canonically survives, and respawns are a game mechanic. If the player destroys the Star Destroyer before the Razor goes into the hangar bay, it can be seen floating in space in the ending cutscene, although it canonically falls to the surface with the Motivator.
In the second mission, the player must protect the commandos. They can have casualties but not too many, although the mission will fail if the transport gets destroyed. The default craft for the first mission is the B-wing, and the default craft for the start of the second mission is the X-wing. There are two separate tech upgrades to be found in the missions. Finding them fulfills the bonus objectives.
- "Casting Shadows" — Star Wars Galaxy Magazine 7
- TIE Fighter Collector's CD-ROM: The Official Strategy Guide
- The Secrets of Star Wars: Shadows of the Empire
- Star Wars: X-Wing Alliance: Prima's Official Strategy Guide
- Star Wars: Rogue Squadron II: Rogue Leader: The Official Nintendo Player's Guide
- Star Wars: Rogue Squadron III: Rebel Strike: The Official Nintendo Player's Guide
- The Official Star Wars Fact File103
- The New Essential Chronology
- The Complete Star Wars Encyclopedia
- Star Wars Art: Visions