The Battle of Dubrillion was a battle during the mid-Galactic Civil War in 3 ABY. The battle, in the midst of the Dubrillion Ocean, was an attempt by the Galactic Empire to draw in and destroy a Rebel Alliance task force commanded by General Crix Madine and deal a crippling blow to the Alliance Special Forces.
The Rebel Alliance's original operation in the Dubrillion system had seemingly ended in failure. Wedge Antilles and his Y-wing squadrons had searched out the energy tunnels in the rings of Destrillion for the location of a tibanna gas mining facility which had discovered by Alliance Intelligence. When no facility was found and the Alliance fleet led by a MC80 Star Cruiser was about to leave the system, they regrouped and passed through Dubrillion's orbit in order to enter hyperspace. In truth, however, the Empire had planned the Rebels' escape from the Dubrillion system, and when the Alliance fleet was caught in orbit and unable to exfiltrate, the Imperials sprung their trap.
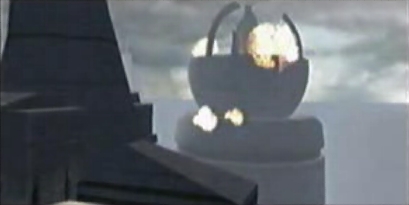
The superlaser's main component is destroyed.
The Alliance convoy was fired upon by an Imperial superlaser on Dubrillion's surface, which destroyed a GR-75 medium transport. As the fleet was not able to do a safe jump into hyperspace, Wedge Antilles was ordered to lead a Y-wing squadron down to the planet. Wedge, when telling Rogue Squadron to descend down onto the planet, also referenced their earlier mission by telling them they weren't finished yet. By the time the squadron reached the superlaser, Madine informed them about three targeting relays the weapon used.
Alliance squadrons swarmed into the Dubrillion superlaser facility, and came under attack by TIE/LN starfighters and TIE/IN interceptors. Along with the fighters, Imperial submarines emerged from the Dubrillion Ocean. Antilles led a bombing run on the three relay dishes for the superlaser, to reduce the accuracy of the main laser. He disabled the shields on the three relays with his ion cannon, then dropped proton bombs on each, destroying them.
During the mission, Wedge Antilles spotted an object within the main superlaser dish. He sent his Y-wing down and managed to recover some advanced spread proton bombs.
While the accuracy of the superweapon was drastically reduced, the Alliance fleet was still taking casualties. In spite of the move to a safer orbit, the fleet was still pinned down. As the facility was also designed to withstand aerial assault, Antilles was ordered to go deep into the facility and shut it down, while his wingmen covered him from the air.
In the midst of the battle, Antilles apprehended an All Terrain Scout Transport by causing an ion cannon blast to skim across its circuitry, not disabling the vehicle but causing it to temporarily malfunction. Upon hijacking it, General Madine reported that they had scientists who were familiar with the facility's layout, and patched one of them through. The scientist then explained that the only way to shut down the superlaser was to destroy its power sources, citing that the AT-ST he hijacked could get him further into the facility. He pressed forward, overtaking a fleeing stormtrooper squad and facing 10 more AT-STs and two stormtrooper-manned E-Webs. He was also strafed by TIE fighters.
While navigating the docking area of the superlaser facility, Wedge made a brief detour, picking up some advanced concussion missiles.
Antilles navigated the AT-ST through the superlaser facility, eventually reaching the elevator into the factory guarded by three AT-STs and stealthy missile droids. The enemies opened fire on his walker, but he survived the travel down to the next level.
The basement level was full of transportation rails. Avoiding explosive containers coming at him from the rails, one of which also destroyed an enemy AT-ST that was on patrol shortly after he arrived on the floor, and engaging more AT-STs, Wedge approached a large open area. While traversing to the next lift, he also exploited the explosive containers to destroy any enemy AT-STs in his path. There, he ditched his AT-ST in the factory in favor of an All Terrain Armored Transport with heavier firepower. With the AT-AT, Wedge was able to plow through the walkers and missile droids in his path, and he opened fire on the three turbines which were powering the superlaser, causing the facility to detonate. Making it back to his Y-Wing, Antilles and Rogue Squadron were able to escape before a chain reaction of several massive explosions pulverized the base.
The plot to destroy the Alliance fleet had ended in failure, and with the loss of a whole superlaser facility, the Rebels dealt a massive blow to the Empire.
This article was created based on a mission in the 2003 video game Star Wars: Rogue Squadron III: Rebel Strike. As the bonus mission Flight from Bespin branches off from the Guns of Dubrillion, it is implied to be concurrent with the Occupation of Bespin and the Duel on Cloud City.
The level was inspired by a rough sketch. In the commentary, the developers admitted that the result of the geometry was one of the best levels in the game.
The strategy guide suggested that the player destroy some of the AT-STs by blowing up the explosive tanks when they are directly near an AT-ST in the factory area.
- Star Wars: Rogue Squadron III: Rebel Strike: The Official Nintendo Player's Guide
- The Essential Atlas